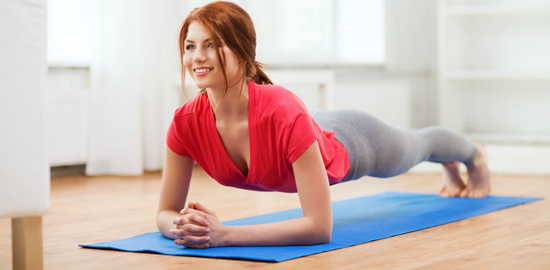
At HomeBodyFit, our clients are used to seeing planks and plank circuits incorporated into their workouts. Why? Because they work! They may be difficult to start with, but once you feel and see the benefits, you’ll begin to crave the burn that comes with doing challenging plank circuits.
The physical and aesthetic benefits of planking are:
- Improves strength and flexibility throughout the body
- Requires focus and mental stamina
- Improves posture, tightens your core and streamlines that waistline!
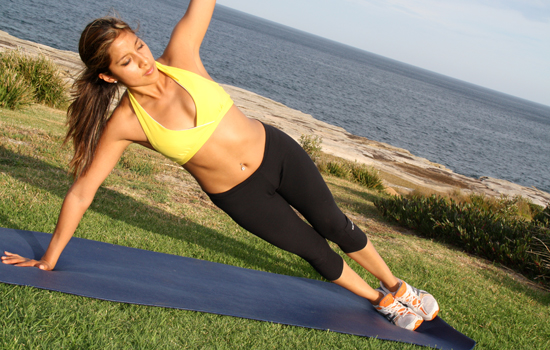
Here’s how to properly do a Full and Side Plank.
How to do a Full Plank

- On a yoga matt, start in a push-up position and lower your forearms to the floor; your elbows and fists are flat to the ground (your hands are either straight out in front of you – palms down or in a fist, or clasped, whichever is more comfortable for you).
- With your toes curled under, keep your back straight, your buttocks down.
- Engage your abs (imagine pulling your belly button towards your spine)
- You’ll feel a burning. Continue to keep your buttocks down.
How to do a Side Plank

- Lie with the whole side (starting on the left or right) of your body on your yoga matt.
- Use your floor-side elbow to prop up your body, keeping your body up on your elbow – aligning your elbow directly underneath your shoulder – and your feet together.
- Your forearm (lying perpendicular to your body), elbow and floor-side foot should be supporting your body.
- Rest your opposite arm along your body or extent it straight up to the ceiling.
- Engage your abs (feel the burn) and hold the pose.
Note: If this is too challenging at first, you can bring your knees down to the floor to help support your weight. To make this exercise more challenging, balance on on just your floor-side hand and foot (pictured above).
Interested in learning more about the HomeBodyFit Plank Circuit (Advanced)? Contact us for a FREE consultation today!
[useful_banner_manager banners=4 count=1]
